Hoe werkt het Download onze stapsgewijze handleidingen
.jpg)
1 Draw the pattern for the bag on the wanted cardboard. (stippled lines are folded and drawn lines are cut, pattern is included the idea.)
.jpg)
2 Cut out the pattern.
.jpg)
3 Scratch the stippled lines using the tip of a scissors.
.jpg)
.jpg)
5 Draw a slightly bigger square than the hole of the bag on to hard foil and cut it out.
.jpg)
6 Glue the hard foil on the back of the hole using double-sided tape.
.jpg)
7 Fold the bag and assemble it with double-sided tape.
.jpg)
8 Press the front and bacf of the bag together and a fold is made on the sides of the bag.
.jpg)
9 Fold the bottom like the end of a present and assemble it with double-sided tape.
.jpg)
.jpg)
11 Assemble the parts with double-sided tape.
.jpg)
12 Draw dots for the hat.
.jpg)
13 Lim prikkerne på huen med dobbeltklæbende tape og klip derefter huens kanter rene.
.jpg)
14 Draw a face and mark the borders with a thin black marker.
.jpg)
15 Make red cheeks with a coloured pencil.
.jpg)
16 Make small dots for the hat using a hole puncher and attach them with double-sided tape.
.jpg)
17 Draw the presents on cardboard using the patterns and cut them out.
.JPG)
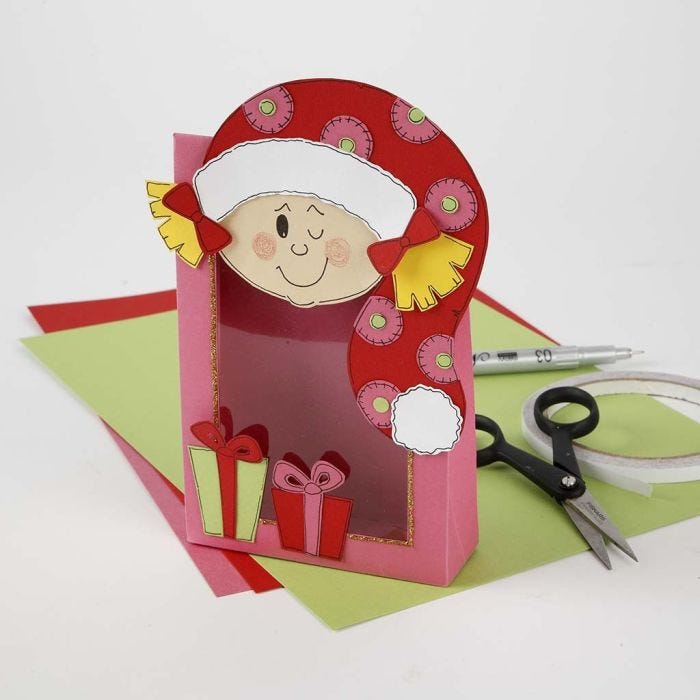
18 Attach the presents and the elf to the bag with double-sided tape.
.jpg)
19 Decorate with 3D liner and gold glitter.

20 Tip!
Here is used a sharp scissors, but you can also use a knife.
The size of the bag can vary.
The patterns just have to be made by the same principle as the shown.
If you want to make a cute lock on the back of the bag, you can close the flap with a heart, a star or another Christmas motive.
The bags can be used as teble decorations, place cards or just for Christmas goodies.
Have fun!
Al aangemeld? Download de sjabloon
Kijk ook bij